 After a far longer than planned gap I've decided to show you a little of what i've been doing since I first discovered Stampin' Up! and the wonderful world of papercrafting.
So I shall start with the pretties!
These were inspired by Katou's lovely gift boxes, complete with these folded dahlias made from Tea Party designer series paper (which I literally just got and I'm completely in love with!)
They were printed using the Bella Toile background stamp and the large flourish from the Baroque Motifs set. Stamped on vellum in the new season shade Rich Razzleberry - which I'm in wonderful danger of overusing - they have a lovely old time look and finished with a Rhinestone Brad they have just a little bit of sparkle to finish them off.
I'm not so pleased with the strips of paper in the middles though - apparently if you catch vellum on a bad day you will never get it to curl!

But I'm endeavouring to learn the secret and will share when I do.
The Dahlias are made from squares of your chosen paper, folded into a cone to form each 'petal', they are then glued to a scalloped circle, to form the shape. More detailed instruction are on Katous site, with the English translation under the French.
The smaller of the two was made to the original sizes (2" and 1.5" squares, with the only difference being that I rounded the outer corners first with a punch and finished by sponging Rich Razzleberry onto the outer edges to darken them. The second was made with 3" and 4" squares, again with rounded corners but no sponging - letting the Baroque Motifs speak for itself!

Incidentally I found that a lovely life-like petal colouring was achieved by sponging the (still flat) paper first in 'wiping' gestures off the edge of the paper, then in 'dabbing' gestures afterwards.
(holding the petal between your thumb and forefinger with your thumb pointing toward the rounded corner gives it some support so that it doesn't crease) You could also build up a very dense amount of colour, giving a dramatic effect.
The picture below shows this a little, but the flower that shows it best was adopted very quickly by my partners mother - photo's when I get it back, I promise.

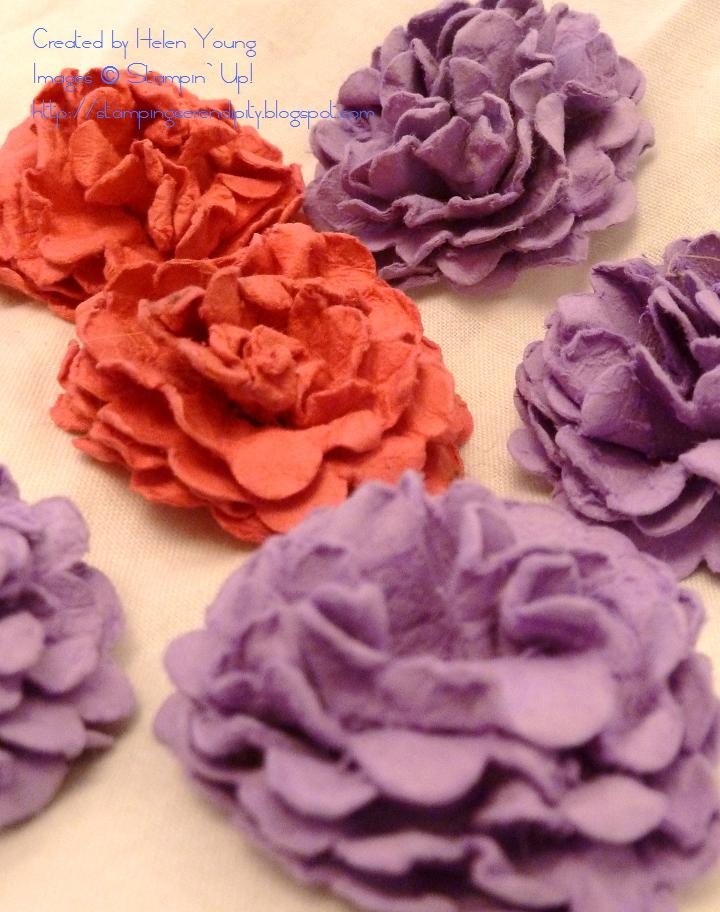
Before I sign off i wanted to show these, which I saw and had to have a go at, again I've given them just a bit of sparkle with a rhinestone brad. They are originally by the amazing paper flower maker Joanne and there's a great video showing you how to make them here.

Next time I'm hoping to post the cake box templates I've made. Why more cake boxes with the plethora available on line already? Well I couldn't find one with a rounded outside edge, and something in me just needed a rounded outside edge. I've also done them in three different sizes, for easy tiering.
Some of the other bits I've been doing, including the voucher wallet made for my dear fellas birthday today are conical favour boxes, pop up cards for a friends daughters birthday and hopefully, lots of invitations for a wedding fair stall coming up in September, which i'm doing with Caroline who is very good at them -so watch out for them.
Until then, have fun.
These are Absolutely Fabulous, and what a way to start off your blog! I'm really looking forward to our stall in September, it's SO exciting....can't wait to see what else you create.....
ReplyDeleteThe flowers are just gorgeous. I think you're blog is great-clean, easy to read- I'm sure you'll do well with your new venture!!!
ReplyDeleteLove the flowers, they are beautiful!!!
ReplyDeleteAngela x
WOW: These flowers are gorgeous, so delicate and pretty.
ReplyDeleteThanks for sharing.
Alex x